CCD2ISO
Converts most CloneCD image file (.ccd) to standard ISO image. Only iso images can be mounted in linux.
Showing posts with label Kubuntu. Show all posts
Showing posts with label Kubuntu. Show all posts
Saturday, May 23, 2009


Some useful one-off commands in Kubuntu
This post will be regularly updated with commands as I come across them...
Mounting an iso image
1) First create the location where you want the mount to be made:
mkdir /MyISOMount1
2) Mount the iso:
sudo mount -t iso9660 CoolStuff.iso /MyISOMount1 -o loop
where CoolStuff.iso is the image and /MyISOMount1 is the location where the image is to be mounted.
3) When you're all done, simpy unmount:
sudo umount /MyISOMount1
Mounting an iso image
1) First create the location where you want the mount to be made:
mkdir /MyISOMount1
2) Mount the iso:
sudo mount -t iso9660 CoolStuff.iso /MyISOMount1 -o loop
where CoolStuff.iso is the image and /MyISOMount1 is the location where the image is to be mounted.
3) When you're all done, simpy unmount:
sudo umount /MyISOMount1
Monday, May 11, 2009
Hardware Monitor for Kubuntu
One thing I missed in my "new" old linux system is a hardware monitor tool to pick up the temperature, fan speed and any other statistics available directly from my hardware... in windows, there were so many to pick from and plenty of reviews and articles. I was surprised such a tool was not bundled with the Kubuntu Installation and nor did any turn up in the Add/Remove App.
The good news is that it is available for linux but is not as simple as install and run as in most stuff in linux. In fact, the hardware monitoring is actually present in the default installation of Kubuntu 8.04 through the lm-sensors package (verify this is already installed from Adept or Synaptic manager and install this if not present).
However lm-sensors has no UI. Presenting a choice of 2 UI tools, K-Sensors and Kima, to fill in this gap.
Note: lm-sensors is not a driver package - it will simply use drivers already installed by Kububtu. This works fine for most desktops but in the case of laptops, chances are slim that kubuntu drivers will be present for hardware monitoring. So lm-sensors wont help.
But before you use these UI tools, you need to setup your system by doing the following:
1) Open a terminal (simply open Konsole in Kubuntu).
2) Next, you need to run a program from lm-sensors package to detect and list all your hardware that has sensors.
Run the following command and hit Enter (yes) to all the subsequent prompts except the last one, "Do you want to add these lines automatically?" (unless you really want to)
sudo sensors-detect
This program will show at the end a summary of all the hardware modules that needs to be added for monitoring
Something like:
#----cut here----
# Chip drivers
it87
coretemp
#----cut here----
Note: If you get a message like "no sensors detected", this most probably means none of your hardware have sensors or your kubuntu drivers are not able to detect them
3) Next you need to include the linux kernel modules detected by running the modprobe command for each of the modules between "cut here"
So for the example above, type and run each of the following (normally you need to prepend with "sudo" to run in admin mode):
sudo modprobe it87
sudo modprobe coretemp
That's it. Now you can install (do it from Adept or Synaptic of course) and run your selected UI tool.
Ksensors can be started normally from the KDE start menu. You'll need to go to it's options menu and add the neccessary sensors you want to monitor.
Kima will not be present in the start menu as it is actually a Kicker applet. To start Kima, right click your bottom panel, select add Applet to panel and select Kima from the list. Kima will run as an applet in Kicker. Again you would need to go to it's conigure menu and add the sensors you want to monitor.
Finally, verify that the values you see in the sensor are accurate as they may be garbled by a factor or 2 sometimes (actual Sensor readings are usually accessible in your system bios).
The good news is that it is available for linux but is not as simple as install and run as in most stuff in linux. In fact, the hardware monitoring is actually present in the default installation of Kubuntu 8.04 through the lm-sensors package (verify this is already installed from Adept or Synaptic manager and install this if not present).
However lm-sensors has no UI. Presenting a choice of 2 UI tools, K-Sensors and Kima, to fill in this gap.
Note: lm-sensors is not a driver package - it will simply use drivers already installed by Kububtu. This works fine for most desktops but in the case of laptops, chances are slim that kubuntu drivers will be present for hardware monitoring. So lm-sensors wont help.
But before you use these UI tools, you need to setup your system by doing the following:
1) Open a terminal (simply open Konsole in Kubuntu).
2) Next, you need to run a program from lm-sensors package to detect and list all your hardware that has sensors.
Run the following command and hit Enter (yes) to all the subsequent prompts except the last one, "Do you want to add these lines automatically?" (unless you really want to)
sudo sensors-detect
This program will show at the end a summary of all the hardware modules that needs to be added for monitoring
Something like:
#----cut here----
# Chip drivers
it87
coretemp
#----cut here----
Note: If you get a message like "no sensors detected", this most probably means none of your hardware have sensors or your kubuntu drivers are not able to detect them
3) Next you need to include the linux kernel modules detected by running the modprobe command for each of the modules between "cut here"
So for the example above, type and run each of the following (normally you need to prepend with "sudo" to run in admin mode):
sudo modprobe it87
sudo modprobe coretemp
That's it. Now you can install (do it from Adept or Synaptic of course) and run your selected UI tool.
Ksensors can be started normally from the KDE start menu. You'll need to go to it's options menu and add the neccessary sensors you want to monitor.
Kima will not be present in the start menu as it is actually a Kicker applet. To start Kima, right click your bottom panel, select add Applet to panel and select Kima from the list. Kima will run as an applet in Kicker. Again you would need to go to it's conigure menu and add the sensors you want to monitor.
Finally, verify that the values you see in the sensor are accurate as they may be garbled by a factor or 2 sometimes (actual Sensor readings are usually accessible in your system bios).
Tuesday, December 16, 2008
Connecting to the Internet with Reliance NetConnect USB Modem in Kubuntu Hardy 8.04
These steps are for Huawei EC325 CDMA modem on Kubuntu Hardy but the same steps could work to install any modem on any linux system (provided the generic driver matches)...
1) Hardware setup
Plug-in your reliance modem into any usb port and start up your computer (or reboot into Kubuntu if it was running when you plugged it in).
Ensure that you see the flashing light on the reliance modem which indicates that the modem at least the usb port you selected is not disabled and that it has range.
2) Identifying modem device
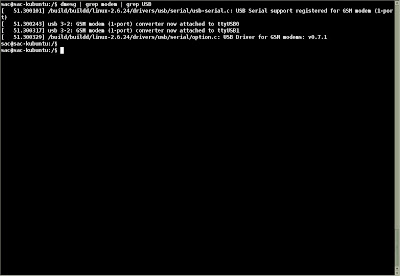
The default installation of Kubuntu Hardy already has the neccessary drivers for Reliance Netconnect EC325. All that needs to be done is to find out the device name that the OS uses to refer to the modem. Usually this is something like ttyUSB0.
A simple way to find out is to look in the OS bootup logs Use the following command at the command prompt which filters out to only the few lines mentioning modem / USB:
dmesg | grep modem | grep USB
3) KPP Setup
To connect to the net, use the standard software, KPPP, to connect to the Internet. Start up this program from Internet->KPPP.
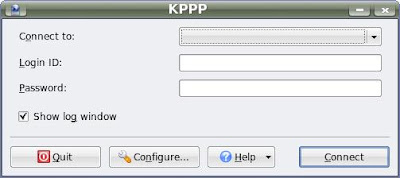
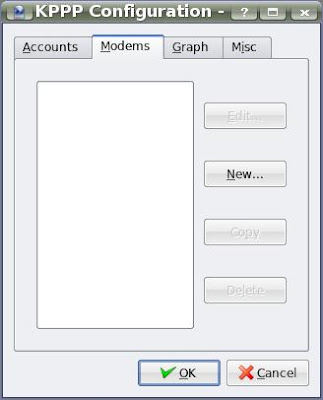
Click on configure to launch the KPPP Configuration window.
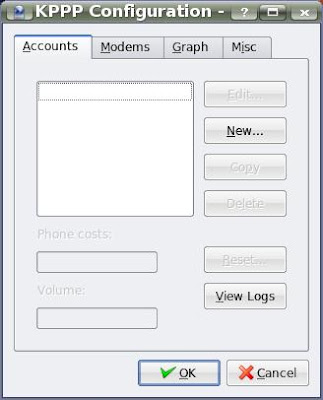
In the Accounts tab of the KPPP Configuration window, click on New... -> Manual Setup.
Give the connection a name, like Reliance.
Add the phone number to dial as #777 .

Leave everything else as default values and press Ok.
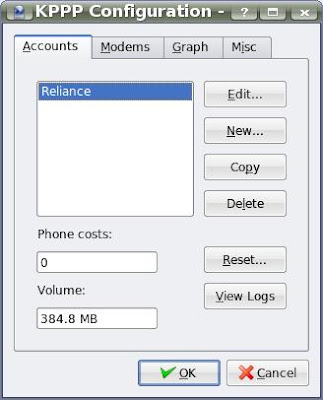
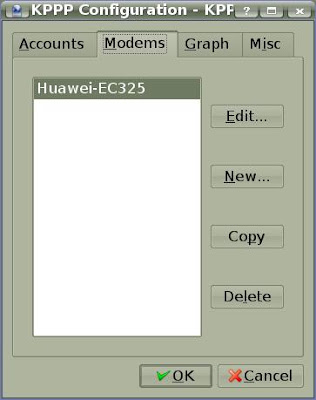
Now in the Modems tab of the KPPP Configuration window, click on New...
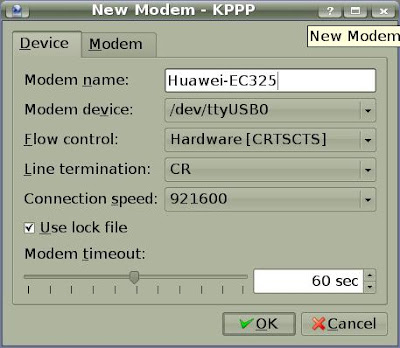
Give your modem a name like HuaweiEC325.
For Modem device, using the value identified in step2, look through the drop-down list and select the entry /dev/xxxx (eg: /dev/ttyUSB0).
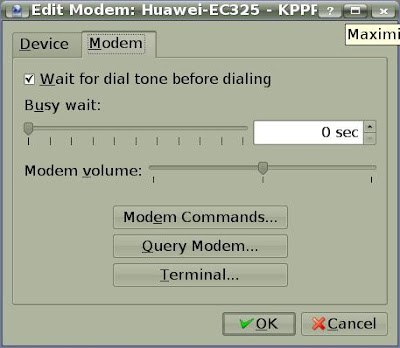
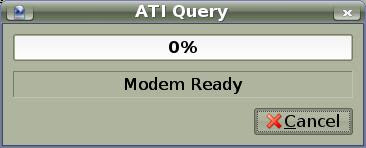
Leave everything else as default values and press Ok.
Press Ok again to leave the KPPP Configuration window.
Finally, back in the KPPP main window, select the newly created Account from the Connect to drop-down list. Enter your netconnect mobile number in the Login ID and Password fields.
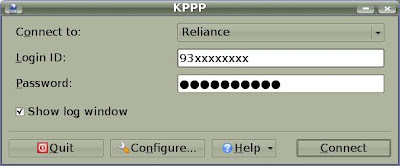
Click Connect!
1) Hardware setup
Plug-in your reliance modem into any usb port and start up your computer (or reboot into Kubuntu if it was running when you plugged it in).
Ensure that you see the flashing light on the reliance modem which indicates that the modem at least the usb port you selected is not disabled and that it has range.
2) Identifying modem device
The default installation of Kubuntu Hardy already has the neccessary drivers for Reliance Netconnect EC325. All that needs to be done is to find out the device name that the OS uses to refer to the modem. Usually this is something like ttyUSB0.
A simple way to find out is to look in the OS bootup logs Use the following command at the command prompt which filters out to only the few lines mentioning modem / USB:
dmesg | grep modem | grep USB

3) KPP Setup
To connect to the net, use the standard software, KPPP, to connect to the Internet. Start up this program from Internet->KPPP.

Click on configure to launch the KPPP Configuration window.

In the Accounts tab of the KPPP Configuration window, click on New... -> Manual Setup.
Give the connection a name, like Reliance.
Add the phone number to dial as #777 .

Leave everything else as default values and press Ok.

Now in the Modems tab of the KPPP Configuration window, click on New...

Give your modem a name like HuaweiEC325.
For Modem device, using the value identified in step2, look through the drop-down list and select the entry /dev/xxxx (eg: /dev/ttyUSB0).
Leave everything else as default values and press Ok.


Press Ok again to leave the KPPP Configuration window.

Finally, back in the KPPP main window, select the newly created Account from the Connect to drop-down list. Enter your netconnect mobile number in the Login ID and Password fields.

Click Connect!
Subscribe to:
Posts (Atom)

 Posts
Posts


